![]()
An inside micrometer reads like an outside micrometer however the scales are just the opposite and reads left to right.
Parts of an Inside Micrometer
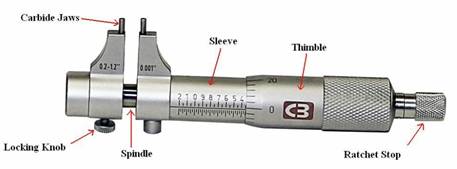
Be sure to unlock the locking knob before attempting to rotate the thimble.
Clean the measuring jaws with a clean cloth before and after measurements.
It is also a good practice to occasionally clean the spindle to keep any contaminants from being drawn into the sleeve. When closing in on the object (to be measured) use the ratchet stop so as to not over tighten the thimble and give an erroneous reading.
When a micrometer is at its minimum reading (.200) the horizontal line on the sleeve should line up with the ‘0’ on the thimble. To see if this is the case you must use the standard that is supplied with the micrometer.
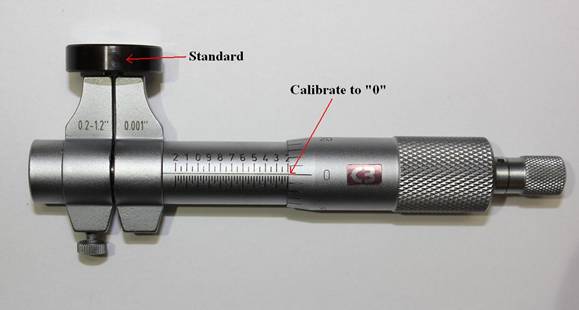 If the 0
does not line up then it will be necessary to calibrate the micrometer by
rotating the sleeve. Each micrometer comes with a half moon adjusting wrench
for this purpose. To make the adjustment simply puzzle the wrench to the side of
the spindle and insert the small tip into the leverage hole.
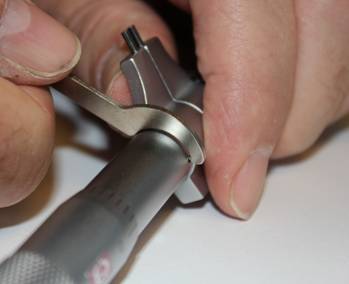
It will not require much effort to turn the spindle however there is sufficient resistance in the spindle so that it will never move on its own.
How to Read an Inside Micrometer Graduated in 0.001"
First of all, the basics:
The pitch of the screw thread on a standard spindle is 40 threads per inch. One revolution of the thimble advances the spindle face toward or away from the anvil face precisely 1/40" or 0.025" equaling the distance between two graduations on the sleeve. The reading line on the sleeve is divided into 40 equal parts by vertical lines that correspond to the number of threads on the spindle. Therefore, each vertical line designates 1/40" or 0.025". The graduation marks on the upper side of the scale represent .050” and is numbered every 2nd mark so every number represents .100”. The lower side of the scale is divided even further with each graduation representing .025”. Thus every 4th line, which is longer than the others, designates 0.100" and matches the upper scale. The beveled edge of the thimble is divided into 25 equal parts with each line representing 0.001" and every 5th line is numbered.
Example:
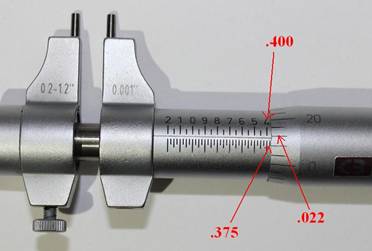
Reading of .372
Remember that the scale is reading backwards (left to right) which is just the opposite of a standard outside micrometer. In the picture above, reading from the upper side of the scale, the bevel edge of the thimble is positioned to where it is setting less than the .400 mark. Looking at the lower part of the scale you can see one more graduation mark revealed and that would be the .375 mark. The next mark that can’t be seen is the .350 mark and that is the figure to begin with to determine the total value. The scale on the thimble is showing the second mark from the .020 graduation mark. Again remember that this scale reads backwards so that would read .022”. Adding the two together the total value would be .350” + .022” = .372”
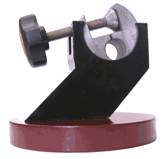
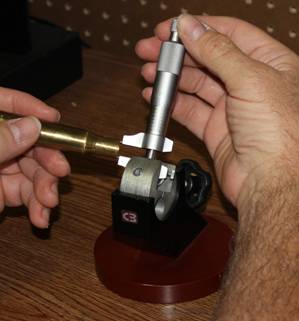
For accurate readings on all precision measurements it is important to hold the work piece squarely with the measuring tool. Consider purchasing a micrometer stand that can serve as a ‘third hand’. A stand can greatly improve the accuracy of a measurement and actually speed up the process especially when measuring parts repetitiously.
